Model Builder
Processing → Model Builder builds a processing workflow as a graph: wire the output of one tool into the input of the next, then run the whole chain as one job. A saved model can be re-run on other layers, exported to a file, or turned into a Python script.
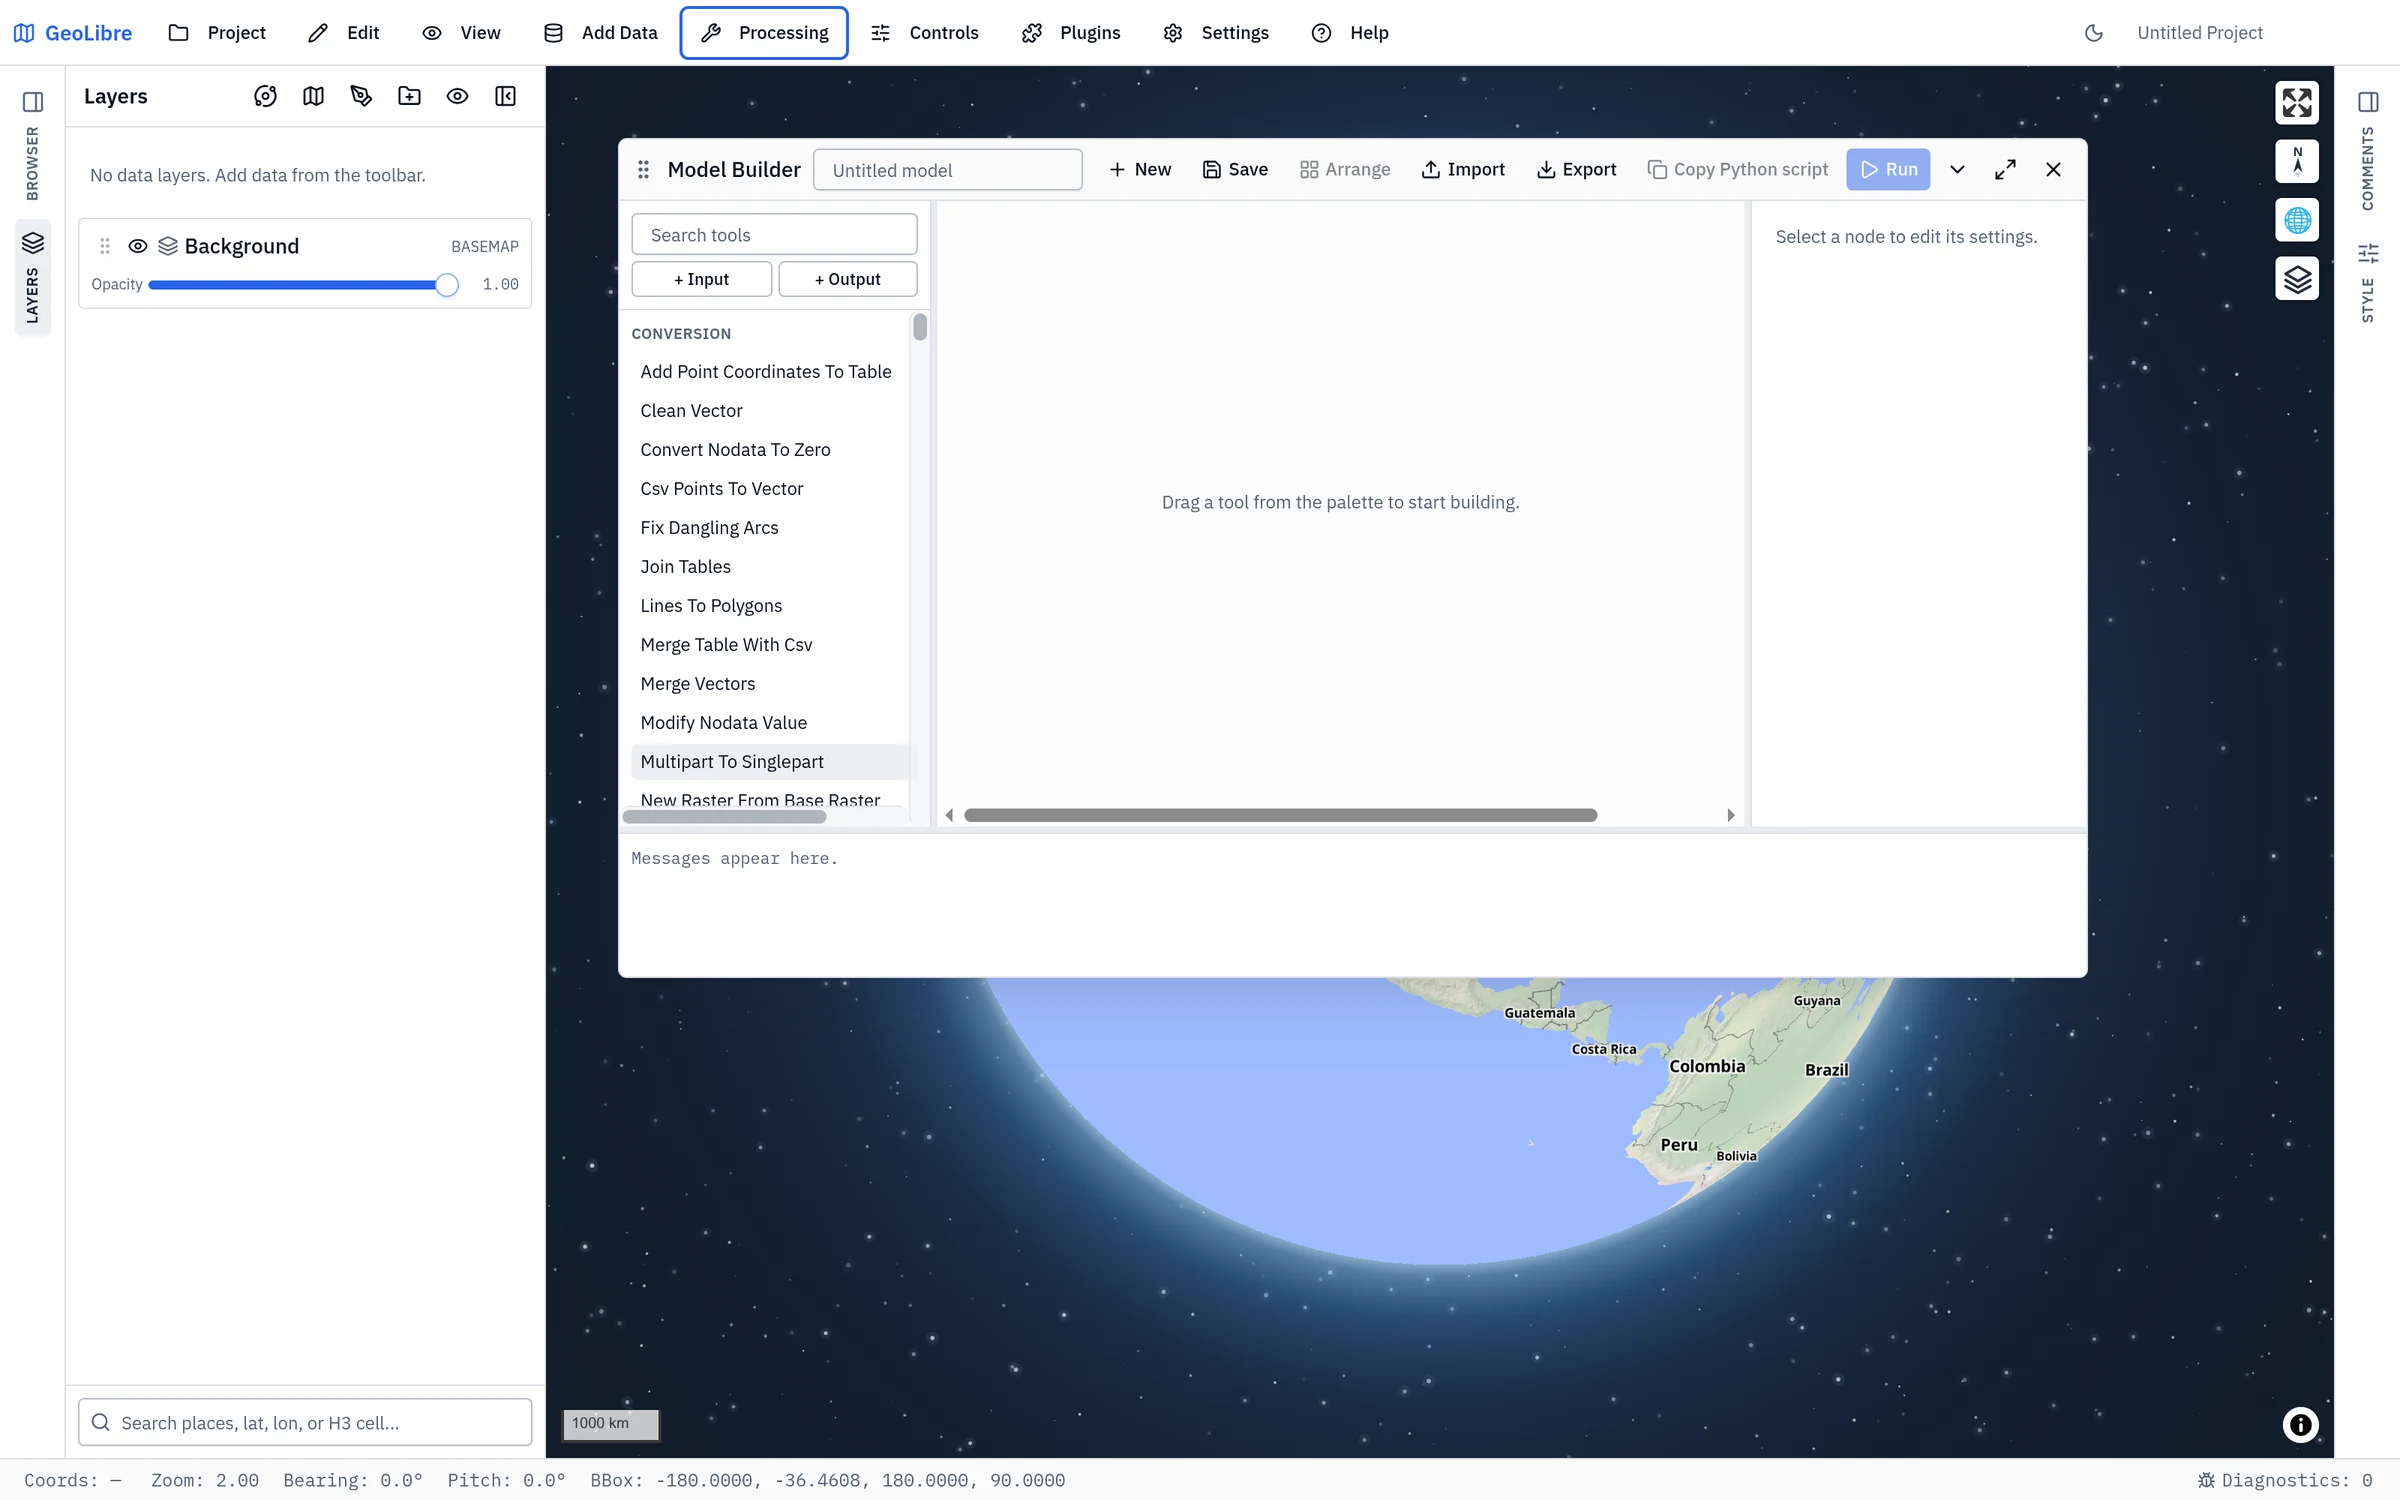
Model Builder opens as a floating panel over the map that you can move, resize, maximize, and minimize. The tool palette is on the left, the canvas in the middle, the selected node's settings on the right, and the message log along the bottom. Drag the splitters between them to resize the columns. On a narrow screen the palette and settings become toggle buttons.
The title bar
| Control | What it does |
|---|---|
| Model name | The model's name (Untitled model until you name it). |
| New | Start an empty canvas, asking first if the current one has unsaved changes. |
| Save | Store the model in the project. See Saving and sharing models. |
| Arrange | Lay the nodes out left to right along the flow. |
| Import / Export | Read or write a .model.json file. |
| Copy Python script | Copy the equivalent geolibre Python code. See Python export. |
| Run / Cancel | Run the model, or stop a run in progress. |
Building a model
Nodes
A model has two categories of nodes:
- Data Flow:
- Input: a layer from the project that feeds the model. Pick it under Source layer in the settings panel. Add one with + Input.
- Tool: one processing tool. Its parameters are set in the settings panel.
- Output: a result that is added to the map when the model runs, named by its Result name. Add one with + Output.
- Control Flow:
- Iterate Features: loops over each feature in a vector layer or collection.
- Iterate Rasters: loops over each raster dataset in a collection.
- Collect Results: aggregates outputs from an iteration body back into a unified dataset.
- If/Else Switch: routes execution down the
trueorfalsebranch based on a condition. - Branch Merge: joins conditional branches so downstream tools receive whichever branch executed.
The palette offers the client-side GeoLibre Toolbox
vector tools, the open Whitebox tool catalog, and
the Control Flow group. Type in Search tools to filter it, then drag a tool
or control node onto the canvas (or click it, or press Enter, to add it at a default spot).
Model Builder enforces structured, deterministic flow: while iterators repeat execution internally per item, arbitrary cycles or unconstrained backwards loops are strictly rejected.
Connecting nodes
Drag from an output port (on the right of a card) to an input port (on the left). From the keyboard, activate an output port to arm it, then an input port to connect them. Each port carries vector data, raster data, or either, and ports that carry different kinds of data cannot be connected.
- Connecting to an input that is already wired replaces the old connection.
- Click a connection's curve to remove it.
- Remove a node with the trash button in its settings panel.
A tool input that is not connected can take a layer chosen directly in the settings panel instead, which is how a one-tool model gets its data.
Drag node cards to arrange them by hand, or press Arrange to lay the graph out automatically (this replaces your own positions). The canvas scrolls to pan; it does not zoom. There is no undo or copy and paste inside Model Builder, so export a copy before a large rework.
Keeping intermediate results
Only results connected to an Output node are kept; everything in between is discarded after the run. To keep an intermediate result, select its tool and press Keep this result (or Keep "port" for a tool with several outputs), which adds and connects an Output node for it.
Checking the model
The canvas checks the model as you build it and lists each node's problems in red in its settings panel:
- Choose an input layer.
- "port" needs a connection or a value.
- "port" already has an incoming connection.
- Those ports carry different kinds of data.
- The model contains a loop.
- Add an output node to keep a result.
- Unknown tool "tool"., or a connection to a node or port that no longer exists.
- Iterate Features requires an input collection connection or layer.
- Iterate Rasters requires an input collection connection or configured raster layers.
- Iterator node requires an iteration body or a downstream Collect Results node.
- Collect Results requires an incoming connection to collect.
- Conditional Switch requires an incoming data connection to route.
- Conditional Merge requires at least one branch input connection.
Run stays disabled until the model has no problems.
Control Flow: Iterators and Conditionals
Model Builder supports structured iteration and conditional execution while preserving deterministic DAG scheduling and preventing runaway infinite loops.
Iterator Nodes
Iterators execute a downstream subworkflow repeatedly across each element in a collection:
- Iterate Features (
iterate-features): - Connect a vector input layer to the
collectionport. - The node provides three outputs for the iteration body:
feature: A single-featureFeatureCollectionfor the current feature.index: The 0-based iteration index.count: Total number of features in the collection.
- Each iteration runs with an isolated context, preventing temporary data or variables from leaking between iterations.
- If the input collection is empty, the iteration completes cleanly without executing the body.
- Iterate Rasters (
iterate-rasters): - Accepts a collection of raster datasets on its
collectionport (or configured raster layers in settings). - The node provides four outputs for the iteration body:
raster: The current raster dataset.name: The current raster's layer name or identifier.index: The 0-based iteration index.count: Total number of rasters in the collection.
- Collect Results (
collect-results): - Closes an iteration loop by accumulating results across all iterations.
- Produces a unified
FeatureCollection(for vector tools) orRasterCollection(for raster tools) that can connect directly to an Output node. A vector collection can also feed subsequent tools; a raster collection cannot, because tools take one raster at a time.
Bounded Execution and Error Handling
Iterators provide execution safeguards in their settings panel:
- Max iterations (
maxIterations): Upper bound on the number of items to process (defaults to 1000 when omitted). - Stop on error (
stopOnError): When checked (default), any error in an iteration immediately halts execution and reports the failure with the failing iteration index. - Cancellation: Pressing Cancel immediately stops processing between iterations, safely releasing temporary resources.
Conditional Switch and Merge Nodes
Conditional branching lets models execute different processing paths depending on data values or metadata:
- If/Else Switch (
conditional-switch): - Accepts data or parameters on its
inputport. - Evaluates a condition configured in the settings panel.
- Emits data on the
trueport when the condition passes, or on thefalseport when it fails. - Branch Skipping Semantics:
- Only the selected branch executes. The unselected branch is marked as skipped (
opacity-60on canvas). - Heavy raster or WASM processing tools on the unselected branch are completely skipped without consuming CPU or memory.
- Branch Merge (
conditional-merge): - Accepts incoming connections on both
trueandfalseinput ports. - Automatically outputs whichever branch was actively executed, providing a single seamless output stream for subsequent tools.
Condition Evaluation System
Conditions are evaluated securely using a built-in expression resolver without dynamic code evaluation (eval):
- Comparison Operators: ==, !=, <, <=, >, >=.
- String Operators: contains, starts_with, ends_with.
- Existence Checks: is_null, not_null, is_empty, not_empty.
- Property & Metadata Paths: Inspect specific feature properties (e.g. properties.population, properties.category) or raster metadata keys (e.g. metadata.bands).
Practical GIS Workflow Examples
Example 1: Iterate and Clip Features
To clip a high-resolution land cover raster separately for every county in a state:
Input (Counties) ──► Iterate Features ──► Clip Raster (using current feature) ──► Collect Results ──► Output
Example 2: Conditional Processing by Elevation
To apply a steep-slope hydrology model only when mean elevation exceeds a threshold:
Input (DEM) ──► Zonal Statistics ──► If/Else Switch (mean > 1500)
                                      ├── True  ──► Mountain Hydro Model ──┐
                                      └── False ──► Lowland Hydro Model  ──┴──► Branch Merge ──► Output
Nested Control Flow
Model Builder supports nesting conditional switches inside iterator bodies. For example, within a feature loop, you can evaluate a condition on each feature's attribute and route it through different vector tools before collecting the results.
Running a model
Run executes the nodes one at a time, each after everything that feeds it. Node cards show whether they are running, done, or failed, and the log at the bottom shows each tool's own messages.
- Vector tools run in the browser.
- Whitebox tools run through the in-browser WebAssembly runner, in the desktop app as well; Model Builder does not use the Python sidecar.
- Each Output node adds a new layer to the map: a GeoJSON layer for vector results, a GeoTIFF for raster results.
- The run stops at the first node that fails, and reports Run failed: …. Outputs added before the failure stay on the map.
- Cancel stops the run before the next node starts. A Whitebox tool that is already running finishes first.
Saving and sharing models
Save stores the model in the project's .geolibre.json, so it travels with
the project. Saved models are listed under Saved models below the canvas;
pick one from Load a saved model... to open it, or Delete to remove the
saved copy (the canvas is left as it is).
Export downloads the model as <name>.model.json, and Import opens one.
The file holds the graph: its nodes (inputs, tools with their parameters, and
outputs, with their positions) and the connections between them:
{
  "$schema": "https://geolibre.app/schemas/model-graph-v1.json",
  "version": "1.0.0",
  "name": "Roads buffer",
  "graph": { "nodes": [ ... ], "edges": [ ... ] }
}
An imported file must be a GeoLibre model, no larger than 16 MB, 2,000 nodes, or 4,000 connections. An Input node stores the id of its layer, so after importing a model into another project, choose each input's Source layer again.
Python export
Copy Python script becomes available after the current model has run
successfully. It copies a script that hands the whole graph to the
geolibre Python package, which asks the app to check and run
it and returns the ids of the output layers:
# Generated by GeoLibre Model Builder.
# Run with the model's input layers loaded in the displayed map.

m.run_model_builder({"nodes": [...], "edges": [...]})
m is a displayed geolibre.Map, in a notebook or the
Python Console. The model's input layers must be loaded in
that map. run_model_builder takes an optional timeout in seconds (600 by
default).
Building a model with the AI Assistant
The AI Assistant can author a model from a plain-language description, such as "buffer the roads by 100 m and clip the result to the county". It looks up the tools, checks every parameter against the tool's definition, saves the model to the project, and opens it in Model Builder for you to review before you press Run. It asks before replacing unsaved work on the canvas.